You opened a blank notebook for your south america travel journal, wrote the date on page one, and then stopped. That pause can turn into skipped pages quickly when fixed dates start adding pressure on long bus days, border crossings, or slow afternoons when you’d rather sketch than write.
A softer setup works better. Cream paper, light pencil lines, and a bendable cover give you room to change plans without making the journal feel messy. These seven simple formats make the notebook easier to carry, easier to fill, and much nicer to look back on.
1. Sketch Your Route on a Map
Trips start to blur when your route lives on scraps of paper and phone notes. Give the opening spread one job: hold the whole journey in one place.
Use a Full-Page Map
Start with a full-page map of South America across the first spread. Mark your planned stops in pencil, then draw the links between them. Pencil matters here because routes change, and you don’t want heavy ink lines boxing you in before the trip has even started.
Add a simple color key in one corner. Use one color for booked stops, another for places you’ve visited, and a third for possible detours. Keep it small and clean, like muted blue, forest green, and a warm rust tone, so the page stays readable on cream paper.
Leave a little white space around the edges for short notes such as bus, flight, or overnight ferry. Later, that first spread becomes your fastest memory check, especially when several countries start to blend together.
Shading your countries cleanly takes minimal effort when Tombow Mini Colored Pencil Set provides those precise, muted shades right in your pocket.


Photo by Augusto Cesar Martins on Pexels
2. Personalize the Cover in Four Lines
A quick four-line cover setup gives your journal a clear starting point before you write any entries. It also helps on the road, because the front instantly tells you whose notebook it is, what trip it belongs to, and what route the pages inside will follow.
- four-line cover: Use the space for your name, trip dates, main route, and a short motto or phrase that feels personal.
- A5 soft cover: Keep those four lines easy to read on a bendable front, so the notebook still packs flat and opens without fuss during the trip.
Keep the text clear and short. Too many words on the front can make it look crowded before you’ve written a single entry. A clean cover also lets you check the trip dates or route at a glance when tickets, maps, and quick notes start piling up.
Jotting down your daily itinerary stays lightweight and flexible because Moleskine Classic Soft Cover Notebook bends easily in your pack.


Photo by ArtHouse Studio on Pexels
3. Build Flexible Undated Daily Pages
Leave the dates blank until the day actually happens. That one habit saves pages and cuts the guilt that starts when a travel day gets skipped.
Make One Simple Template
Set up a repeatable layout for daily events, memorable moments, and practical notes. Put the place name at the top, then add space for the date, weather, costs, and one main memory. If your notebook has 100 pages, or 200 writable sides, a loose template helps you spread entries across the trip instead of racing to fill every page.
Leave Gaps on Purpose
Some days deserve two pages. Some deserve two lines. That’s why undated pages work so well for first-time travel journals. You can leave a half page open for a ticket stub, a late note from the next morning, or a quick detail you forgot at sunset.
This approach also keeps the journal honest. Travel rarely fits a neat calendar, and your pages don’t need to pretend it does.

Photo by ArtHouse Studio on Pexels
4. Pair Writing With Visual Memories
Many beginners glue everything onto one page, and the journal gets thick, stiff, and hard to close. A better method is to split each memory across two pages, one for words and one for visuals.
Use facing pages with lined paper on one side and a blank page on the other. Write the story on the lined page, then place a small sketch, tiny route map, ticket stub, or color note beside it. A market scene can sit next to a few lines about the smell of fruit, faded awnings, or the gold light in the evening.
A simple layout works well. Keep your diary entry on the right-hand page, and use the left for the visual piece. If you add keepsakes, tape flat items near the outer edge and avoid bulky pieces near the binding, where the notebook will strain and stop closing well.
This format gives every stop a balanced spread. You’re not forced to draw well, and you’re not stuck writing long entries when a quick sketch says more.
Securing ticket stubs and receipts without extra bulk becomes effortless when Scotch Double Sided Adhesive Roller rolls on smooth adhesive.
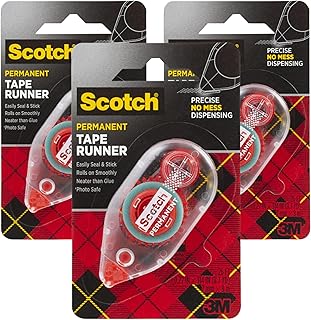

Photo by İclal Çapoğlu Cinal on Pexels
5. Create Destination Spotlight Spreads
A plain daily entry can miss the feeling of a place. A two-page spotlight spread gives standout stops their own space, so the memory feels bigger and easier to revisit.
What to Put on Each Spread
- First impression: Write the first thing you noticed, such as cold morning air at Machu Picchu or the sound near Iguazu Falls.
- Sensory details: Add what you heard, smelled, or tasted. Cartagena might call for color, music, and street food notes.
- Favorite moment: Save one small scene, like a view, a conversation, or a quiet walk.
- Quick sketch space: Leave a blank corner for a skyline, path, or landmark outline.
Keep the layout the same each time. The places will still feel different, and your pages will look neat on the road.

Photo by Gülümser Çiçek on Pexels
6. Organize Three Months at a Glance
You’re in a hostel common room on the last night of the month. Tickets are stuffed in one pocket, notes are scattered, and the route already looks different from what you planned. This is where a monthly section helps.
Set Up Each Month Fast
Give each month two opening pages. On the first, sketch a simple route overview and list your top stops. On the second, leave a blank highlights list so you can fill it as the days pass.
End the month with a recap page. Compare what you expected with what surprised you, note rough costs, and name the best experience. For a three-month trip, that structure keeps the journal clear without forcing a fixed daily format.

Photo by Harsh Kukadiya on Pexels
7. Add a 13-Country Back Index
Where did you write that note about buses, food, or a beach town? A back country index solves that fast. Use the final pages to list all 13 South American countries, then leave space under each one for page numbers, small sketches, saved tickets, and future-trip ideas.
- Keep one short section for every country, visited or not.
- Add page references as you go, in pencil if your route may change.
This works well in a 100-page journal because the front can hold the trip story, and the back stays easy to scan later.

Where to Start First
The 13-country back index often gets skipped, yet it can save the most time after your trip. Months later, you’ll still know where your Cartagena notes sit or which page holds that Iguazu Falls sketch. It also leaves room for places you missed this time, which turns your notebook into a plan for later, not just a record of one route.
Start with the step that removes friction fastest. If fixed dates make you freeze, set up the undated daily pages first. If loose notes get lost, start the back index before anything else. If you want one strong memory cue right away, make your first destination spotlight spread and let the rest follow from there.
Read next: 7 South America Travel Destinations for Couples


